Home Automation Using Web App With Raspberry Pi Circuit Diagram Welcome to the second section of our beginner's guide on creating a smart home with Raspberry Pi. In this section, we will focus on the initial setup of your Raspberry Pi for your smart home project. Let's dive in! 1. Raspberry Pi Setup. The first step is to install the Raspberry Pi operating system on your device. The beauty of a Raspberry Pi-based home automation system is its scalability. As your needs grow, you can integrate additional devices and sensors. Step 10: Adding New Devices. Adding new devices involves wiring them to the GPIO pins and configuring them in Home Assistant. For example, integrating a smart thermostat can provide more precise
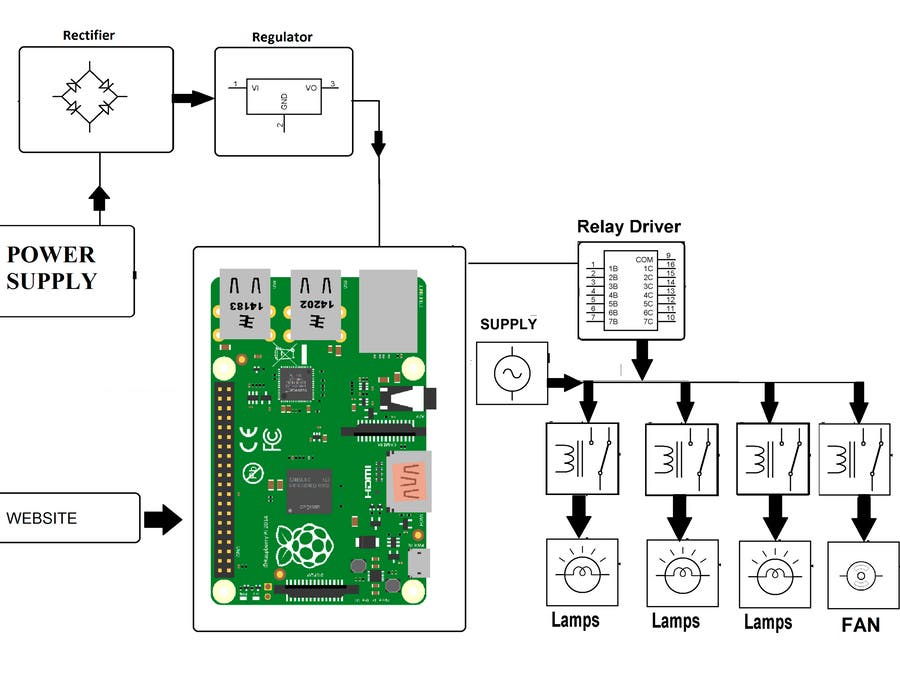
A 1N4001 diode is used to protect the transistor from reverse voltages created in the relay coil. The circuit can be powered either using the 5V supply from the Raspberry Pi or using an external battery. Use the schematic and pinout diagram below to make the connections for the Raspberry Pi home automation system.

Setting Up a Smart Home Hub with Raspberry Pi 5: Automate and Control ... Circuit Diagram
Use services like IFTTT or Node-RED to connect your Raspberry Pi system to Google Assistant or Alexa. Set Up Commands Example: Say "Turn on the lights," and the Raspberry Pi activates the relay module connected to your lights. Step 6: Remote Access. Secure Access Use DuckDNS or Ngrok to enable remote access to your home automation dashboard.
It is capable of running a variety of operating systems, such as Raspberry Pi OS (formerly known as Raspbian) and Ubuntu, and can be used to create a wide range of projects, including home automation systems. Raspberry Pi has a large community of users and enthusiasts, which means there are plenty of resources and tutorials available to help
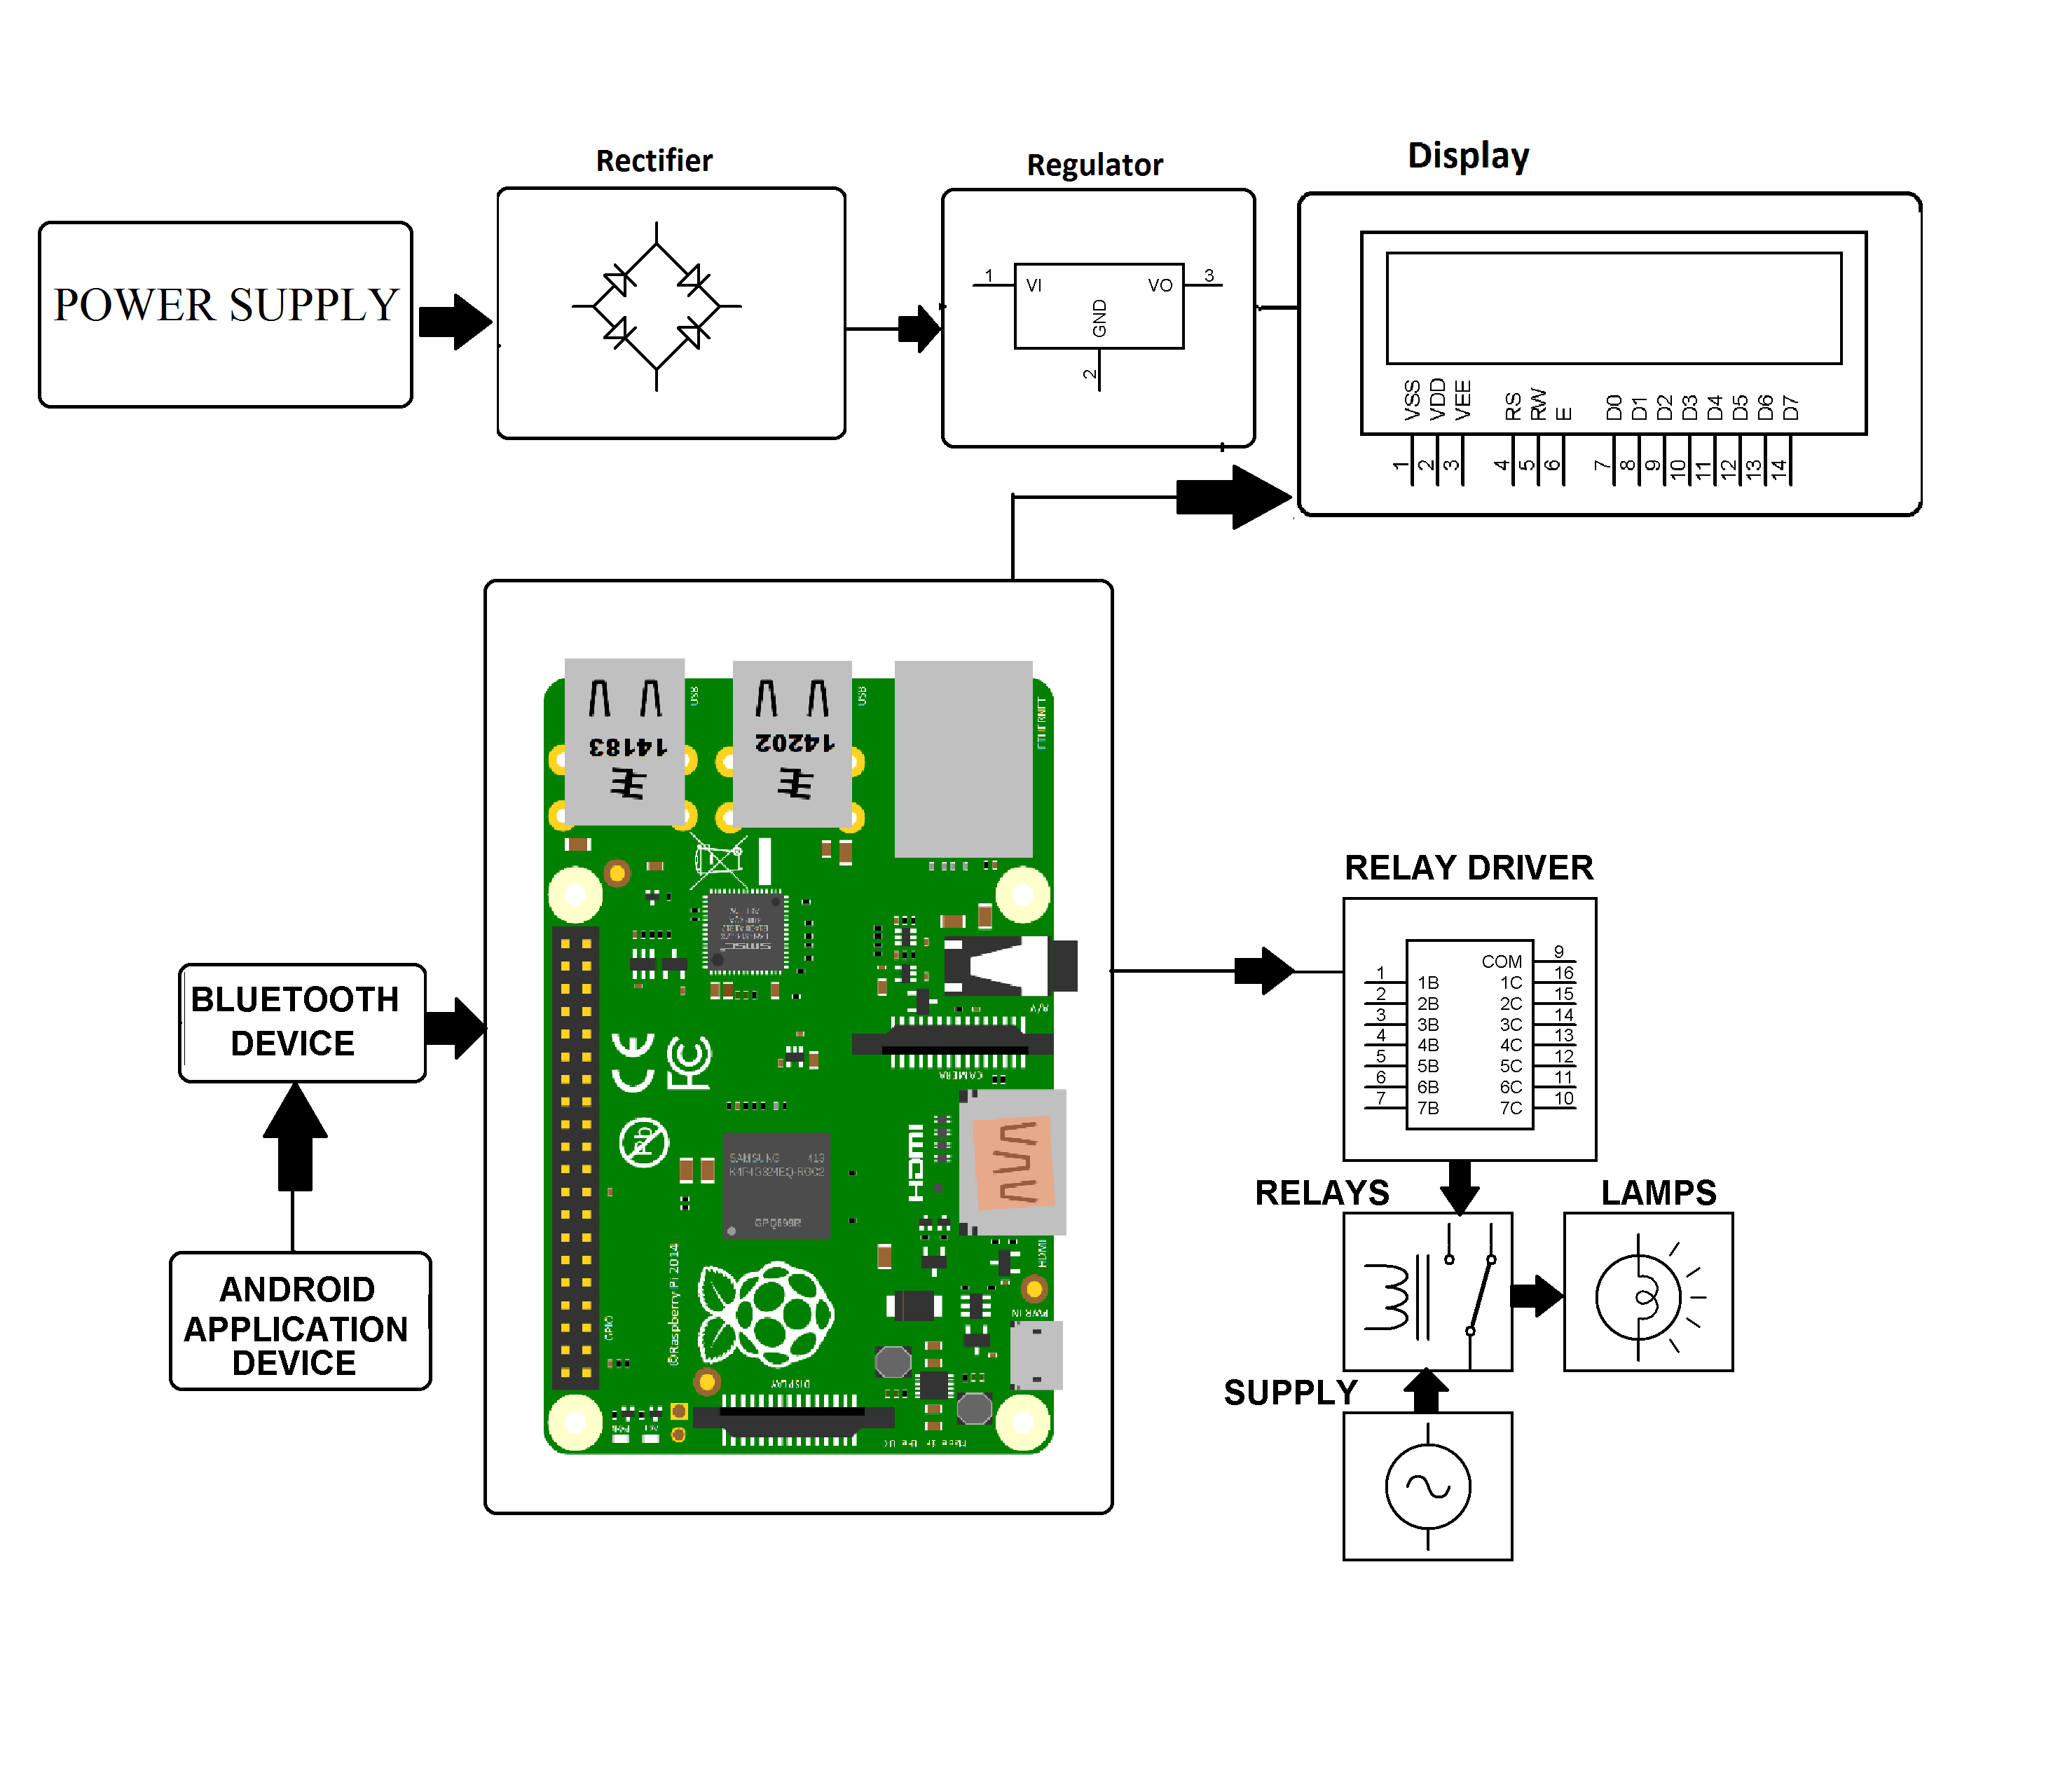
How to Create a Home Automation System Using Raspberry Pi Circuit Diagram
Creating Automations. Navigate to Automations: In the Home Assistant interface, go to Configuration > Automations. Create Automation: Click on the "+" sign to create a new automation. You can set triggers, actions, and conditions for the automation. By connecting your smart devices to Home Assistant and creating automations, you can control and automate various aspects of your home, making
